Blog.
Comet+ Prototypes Ready to Show at CommVEx 2012
Posted on July 24, 2012 in Category: Blog - 0 Comments
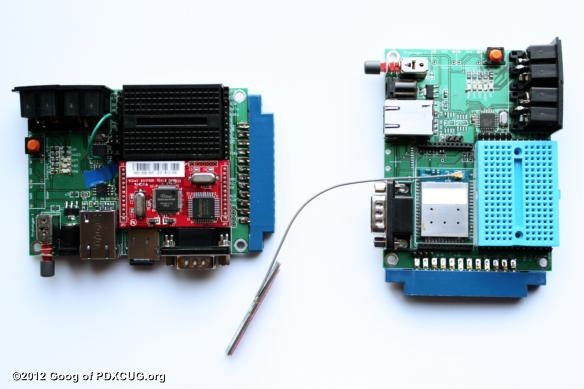
I got two of my prototype boards all ready to debut at CommVEx 2012. CommVEx will be the first public appearance of the Comet+, though it will not be a fully functional demo since not all of the firmware is complete.
GPIO Test on a C64: PASS
Posted on July 10, 2012 in Category: Blog - 0 Comments
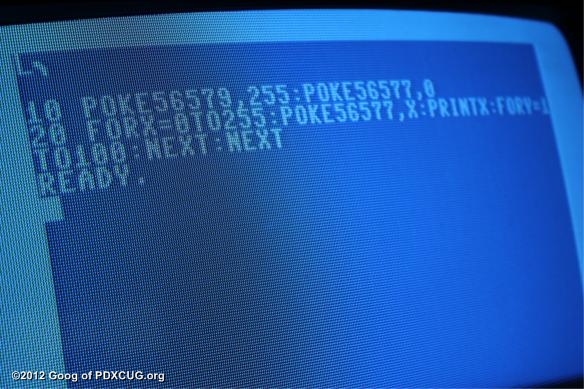
Today I tested the General-purpose I/O which the AVR uses to talk to the C64 on the user port. In this test, I wrote a quick BASIC program that changes the state of the user port lines, counting from 0 to 255 and outputting that value on the user port. Then I had a program running on the AVR that monitored the GPIO state and output it to a serial line which I monitored on my PC.
The test passed, but had one strange anomaly. Every time I changed bit 4 from low to high, there would be this long delay. Not sure what that's about, but I'll get it figured out. It might be a bad solder connection or perhaps one of my traces.
This design is not yet final because I am likely moving to another chip which won't require this feature. However, I may still include it in the next design as a user-programmable I/O. All the other peripherals on board will likely be connected without the need for the GPIO.
SPI Bus Mystery SOLVED
Posted on July 6, 2012 in Category: Blog - 0 Comments
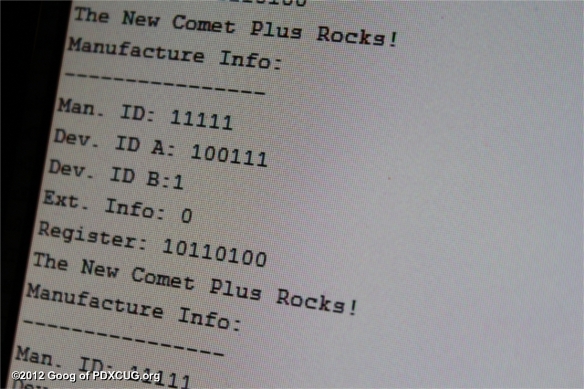
The text The New Comet Plus Rocks! was stored in Flash and was repeatedly read and displayed.
So it turns out it was not the MISO line at all (see my post from June 21). It is the slave select that was not working. So what I thought to be was NO data coming back from the flash chip was correct - but for the wrong reason.
In my code, I am using the pre-declared variable A7 for the chip select on the flash. But when I tried using the same line to the blinking LED program, the LED did not light at all. So at least I now know the CS line is not activating. More to come after I figure out why...
Update: It appears that ports ADC6 and ADC7 are only analog inputs and are not dual-purpose digital I/O pins. That's gonna change a few things around in my design!
Comet64 Backward Compatibility Test: PASS
Posted on July 5, 2012 in Category: Blog - 0 Comments
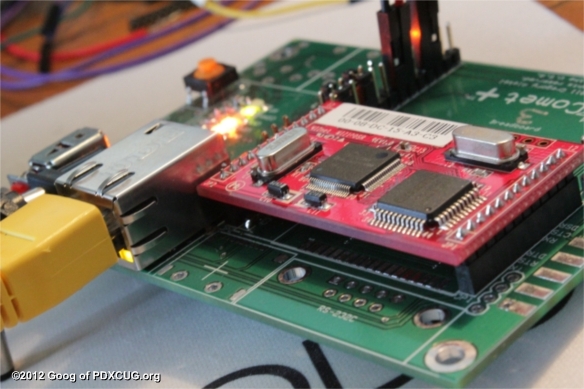
Hooked up the Wiz100SR - the module I used in the Comet64 - to see if the ATMega chip could access it and to make sure that it connected to the Internet in the same way as the Comet64. The test passed.
Hold on there - it wasn't THAT easy, of course... there's always something to go wrong and here's what did go wrong: After soldering it up, I was unable to see the Wiz100SR with the Wiz Config Utility - the LINK LED was working and I saw the ACTIVITY LED blink a few times, but it was dim. Didn't think anything of it at the time. I then tried the module back on a standard Comet64 and saw that the configuration was all screwy. Something changed it.
Later, I uploaded my "Blink LED Test Program" which worked fine until I put the Wiz100SR back in there. I also noticed the power LED was dimmer than usual. This led me to believe that there was some sort of power problem.
Good thing for Thursday night Commodore fun - Agent Friday came over and we did some troubleshooting. First, I tried replacing the capacitors (I wasn't super happy about the soldering job so I thought there could've been an issue with that). Same problem. Next, we decided to plug in only one side (the ethernet side) of the module, leaving the other side dangling. Same thing. A-ha! Now we're getting somewhere. So we started removing the pins on one of the risers, one at a time until the blinking LED program worked. It was the first pin I tried. So I got to thinking... let's try another power source, so we hooked up a different adapter that goes through my breadboard, which is all power regulated to 3.5 volts. It worked!
We then looked at the wall wart (which is one of those universal adapters)... the power was set at 3v - not nearly enough to power all the devices on the board. So I bumped it up to the next choice: 4.5v and that provided enough juice for it to work. Whew! One nice thing about all this is that I discovered the voltage regulator I'm using has a giant voltage drop of 2.2 volts at 350ma (!!), which is partially to blame. I'll now be doing some research on a better regulator.
Now I'm wondering if this power problem is related to the MISO problem I posted earlier... on to the next test!
Wi-fi Module Test: PASS
Posted on July 2, 2012 in Category: Blog - 0 Comments
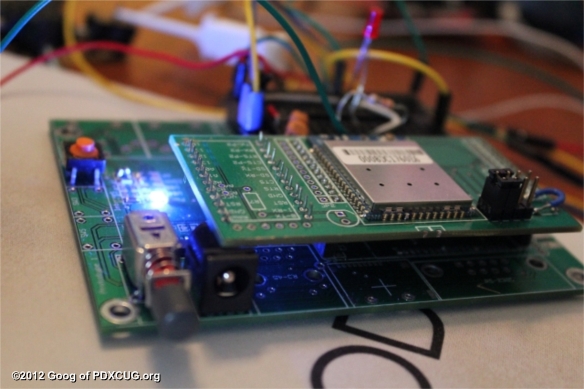
I ran into some trouble when testing this... I guess there is always something that can go wrong. After a lot of time spent tracking this down with Agent Friday, we noticed that a module used for TX/RX to my PC (converts logic levels into RS-232 levels) requires 5 volts and not 3.3 volts, which is what I was supplying it. After we got that figured out, we discovered one of the AVR pins wasn't soldered down. It figures it had to be one of the pins that I needed for testing this. Once I got it soldered down, I realized that the test program had the TX and RX lines mixed up. Three problems solved at once.
Wi-fi Module Testing on the Prototype
Posted on June 26, 2012 in Category: Blog - 0 Comments
My first test was to solder the wi-fi module to the Comet board. That was a mistake since I couldn't get it communicating. So now I have a board that has a module stuck to it in who knows what kind of state? I guess I'll have to solder up my third prototype board - the first one has the MISO problem and a trace cut. This second one has a wi-fi module surface-mount soldered to it and it may or may not be causing other issues for other testing.
So I'll be soldering up Comet prototype #3. But how will I test it? I have an idea - maybe I can use the original Comet64 wi-fi upgrade prototype module (the one that plugs into the Comet64 where the Wiznet module rests). It basically extends the communication up from the female headers to the module above, so it really should work well.
SPI MISO Test: PASS (I Think)
Posted on June 24, 2012 in Category: Blog - 0 Comments
I tried so many different combinations of things: I soldered up a new board, tried hooking up the flash chip on a breadboard, cut a suspicious trace on the first proto board to see if it affected the MISO line, and more. I did so many different tests that by the time I got around to getting something working, I had forgotten all about what I tried (bad note-taking this time). So while I think it is solved, I will be running some of the same tests again, troubleshooting the original problem from the beginning, but taking better notes this time.
Moving on to my next test... I'll revisit this later.
SPI MISO Problem
Posted on June 21, 2012 in Category: Blog - 0 Comments
I've been unable to read any of my SPI devices. I think I've isolated the issue to the MISO line which is what the slave devices use to send data back to the microcontroller. I soldered up a new prototype board with just the microcontroller and supporting circuitry to flash the bootloader and upload a sketch. (Sidebar: incidentally, the bootloader is flashed using the SPI lines but in this case, the MCU is the slave instead of the master)
I then wired up a flash chip (which I have working on the Arduino breadboard) to the breadboard on the Comet. Same behavior, which is that it appears that the MISO line is being held low or low enough during transmission to push back faulty data (usually the equivalent of 0, which would indicate the data is LOW). I have reviewed my traces and they look fine, but something is definitely interfering.
Custom Arduino Bootloader Flashed
Posted on June 19, 2012 in Category: Blog - 0 Comments
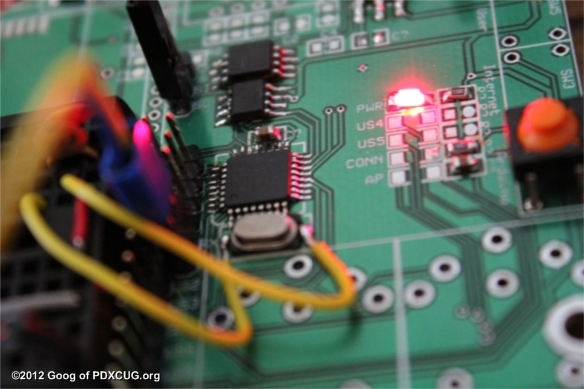
It took some work. I found a few problems with the initial board design so I fixed those up (with wire hackery on the breadboard) and was able to flash the bootloader to the ATMega chip. After I flashed the custom bootloader, I was able to upload a test sketch which blinked an LED on/off. I used the "USR" pin available on the Comet board, tying it to a resistor through to an LED on the breadboard. I can tell having this breadboard is going to be a lot of fun!
Proto 1 Board Changes
Posted on June 18, 2012 in Category: Blog - 0 Comments
Just a few board mistakes I discovered while soldering up the first prototype:
- Forgot to put 5v to one of the chips
- Incorrectly traced my output power in one spot (nothing critical)
- Power switch holes too small
- Reset switch holes too small
- Need TX label on user port header
- Power input/switch needs improvements
- A trace on the ATMega is not grounded (but works anyway because it touches ground - but technically they are not connected in the CAD file)
- Power LED was not grounded
- Would be nice to have standard MK-II header for flashing the bootloader
- Would be nice to have header to match the Sparkfun FTDI programmer to upload sketches from PC
- Mounting hole collides with a trace and therefore grounds it (not critical for prototype)
- GPIO trace too close to another pin
Comet+ Prototype Boards Have Arrived
Posted on June 18, 2012 in Category: Blog - 0 Comments
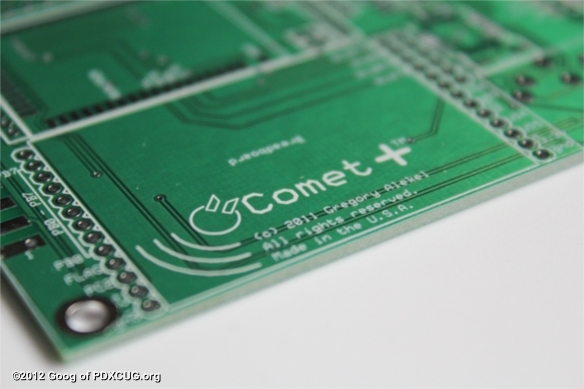
I'm so excited about the new boards. This is the first non-breadboard prototype. I'll be first wiring up the ATMega chip just to make sure the AVR is working properly. Once I know that works, I can add the sub-components and test them out individually.
Comet+ Prototype 1 Layout Draft
Posted on June 12, 2012 in Category: Blog - 0 Comments
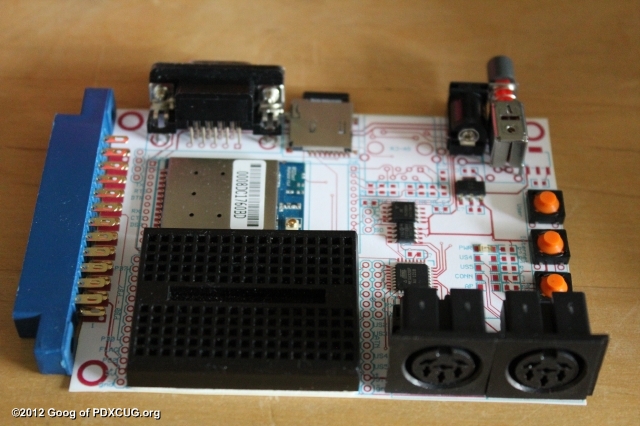
I modified the layout slightly - made the board a little bit bigger and squeezed the IEC ports next to each other. I think this was a good decision. Since the board is so deep, having the IEC cable come out the back would make the space required behind the C64 so much deeper. Of course, this can still be run stand-alone, but then you'd lose out on the User Port.
Another nice thing about this change is that the three buttons are more accessible. In the old layout, they were bunched up against the IEC connector which would have made it difficult to press them. This also opened up the middle area quite a bit so that I could consolidate the LEDs into a single location. It makes the board so much neater looking, in my opinion.
I've submitted this design. It should arrive by early next week.
Name of Comet 2.0 Will Be Comet+
Posted on June 12, 2012 in Category: Blog - 0 Comments
Well I finally decided upon a name for the new Comet. Since the Comet64 is already known to be an Internet device, I thought it would be nice to keep the name, but distinguish it from the previous version due to its new feature set. Since the Comet+ does so much more, it made sense to call it Plus. Also, I figured I should remove 64 from the name to avoid confusion with people who think the Comet64 can only be used on a C64 (it can indeed be used on a C128, Vic-20, Plus/4 and C16).
One thing I wanted to make sure about was the ability to support all the AT commands for BBS servers. Modems use +++ as a way to draw attention to the modem for an upcoming AT command. I thought it might also be a neat tie-in to the BBS/Modem design to visually show the + character.
So I registered the domain name CometPlus.net to be the official site of my Comet development.
Now to convert all my notes over to this blog... you won't see that progress because the whole site will already be here by the time you read this, hehe. Luckily, I've kept pretty good notes - much of this some of you have seen in my shared Google Docs documents, or other places, but now I have an official place for all of it.
IEC Open Collectors
Posted on June 6, 2012 in Category: Blog - 0 Comments
Looks like the 1541 drives and other devices use open collectors to help drive the voltages on the IEC lines. Some devices do not implement this and I've heard that it can cause issues if there are multiple devices on the bus.
Thanks to JBev's help in figuring it out, I'll now be adding this feature so that it will behave well on laregly-populated buses.
Comet 2.0 Layout DRAFT
Posted on May 24, 2012 in Category: Blog - 0 Comments
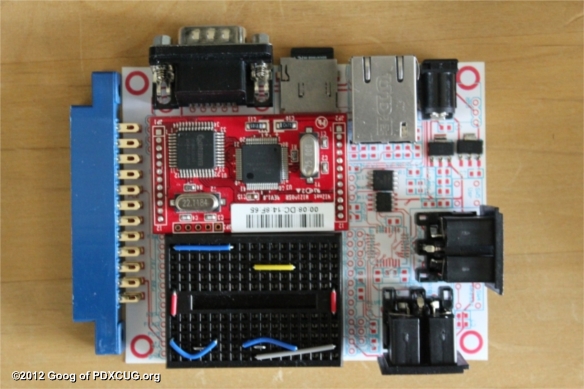
Here's a picture of my proposed layout. It was really difficult coming up with a layout since there are so many pieces. Some of my Comet64 customers have said they didn't need the wi-fi and having the LAN cable would be just fine. Keeping the Comet64 parts on-board was a requirement so that people can reuse the module (which is an expensive part) from their original Comet64 to get the upgraded functionality of the other parts.
In an effort to keep the size minimal, I have one IEC port pointing out to the side and one to the back - this would give people an option for where to put the cord. The one that goes out to the side will clear the C128's RGB cable (which is why none of the components point out that way).
uIEC vs. Breadboard
Posted on May 24, 2012 in Category: Blog - 0 Comments
As much as I like the idea of having the uIEC on-board, I think it might be quite fun and useful to add a mini breadboard so that you can add your own components and make your own peripheral. Let's say a new component comes out and you want to interface it with your C64. Just wire it up and modify the firmware and presto! A new device. I'm thinking people can share their project ideas and code with one another so that more options are available to everyone.
For example, you could hook up an FTDI chip and a USB connector and interface it to a modern computer. Or the next new interface on the market, whatever that may be. This just allows the Comet to be expanded into new uses without upgrading hardware.
Come to think of it, there's no apparent reason why you couldn't just add the uIEC to the breadboard!
Comet 2.0 Block Diagram
Posted on May 21, 2012 in Category: Blog - 0 Comments
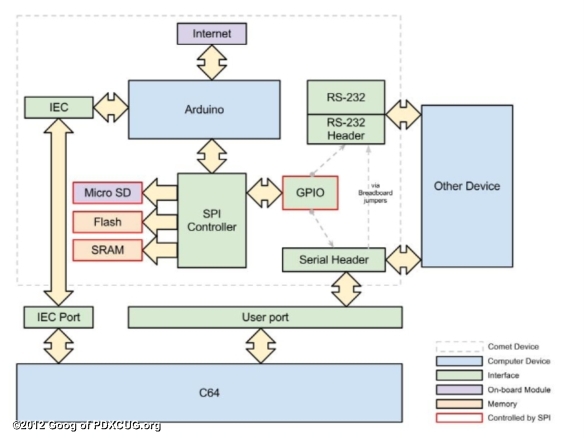
I drew up a little block diagram to show the flow of information between the different components on the Comet board. This makes it much simpler to finish up the final prototype design.
Flash and Static RAM Test: PASS
Posted on May 17, 2012 in Category: Blog - 0 Comments
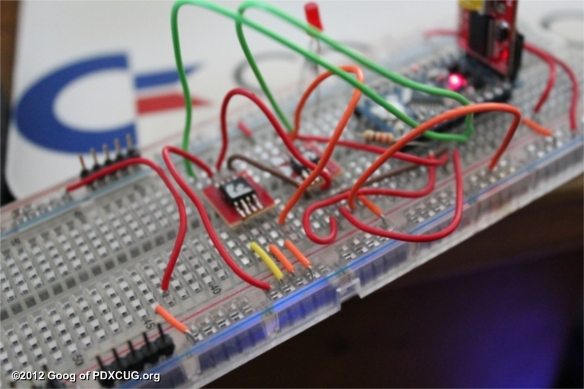
Just a breadboard test today... I was able to wire up both the static RAM and flash RAM to the Arduino and read/write from/to it just fine. It's a pretty good feeling when I remove the power, reconnect, and re-run this program to see the same value in the same memory location of the flash chip. Of course, the static RAM is another story since it gets erased when powered off.
Custom Arduino Bootloader Test: PASS
Posted on May 14, 2012 in Category: Blog - 0 Comments
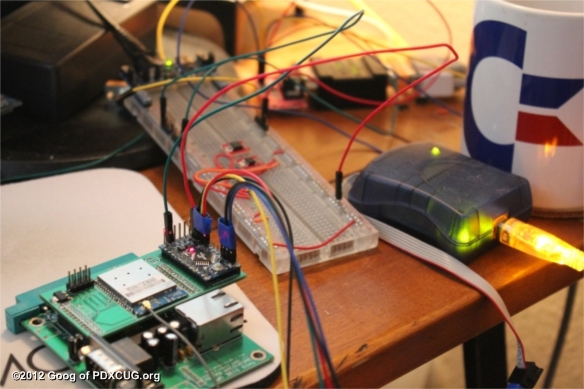
Yesssss!! FINALLY, I was able to get the custom bootloader working. Now I can have the Comet 2 upload Arduino sketches (or firmware) directly from the C64. This was a major hurdle that I'm happy to report is now removed. Let the progress continue.
Custom Arduino Bootloader Not Working
Posted on April 9, 2012 in Category: Blog - 0 Comments
Well this is a major problem. I discovered that the bootloader was NOT installed correctly, as I thought it was. It turns out that what I thought was the bootloader was just a normal Arduino sketch that happened to be in the bootloader's program space. So being able to talk to it worked just fine. But uploading sketches was not working.
Looks like it is back to the drawing board.
SUCCESS Talking to the Arduino from the C64
Posted on February 17, 2012 in Category: Blog - 0 Comments
I wrote a little program that interrogates the Arduino for its device information, along with some other parameters. The program runs on the Commodore 64 and it is able to communicate perfectly with the new bootloader that I put on to the ATMega chip. This is good news because it is the start of being able to upload Arduino sketches (and firmware) directly from the C64 (or other computer if the code is ported).
Uploadable Firmware from the C64
Posted on February 17, 2012 in Category: Blog - 0 Comments
I was able to get the custom bootloader rebuilt. Now I should be able to upload Arduino sketches (or firmware) directly from the C64. Once I figured out how to actually do this, it was a little easier than I thought. Hindsight is always 20/20, huh?
Wi-fi Testing at Panera Bread
Posted on January 5, 2012 in Category: Blog - 0 Comments


Had a meeting with Agent Friday and Robert Bernardo. I was showing Robert the wi-fi portion of the Comet 2 so we did some "testing in the field". Unfortunately, we were unable to connect to their wi-fi due to an extra layer of security using a Web page with SSL. Starbucks has this same issue which I will need to crack so that I can haul my SX-64 into Starbucks and use it on their free wi-fi!
Adding Some Static RAM
Posted on January 3, 2012 in Category: Blog - 0 Comments
I've decided to add some static RAM as well - this will be very handy for quick data buffering or as a general-use storage facility / REU-type scenario. Thanks to Mech (from Mechware) who helped me find a good chip to use. It also uses SPI, which is what the other RAM devices will use. This is the Microchip 23K256, which is 256Kbit (32KB).
Now we have the following parts on-board: 4MB Flash RAM, 32KB Static RAM, and a micro SD card. Is that enough?
Found Some Good Flash RAM
Posted on November 18, 2011 in Category: Blog - 0 Comments
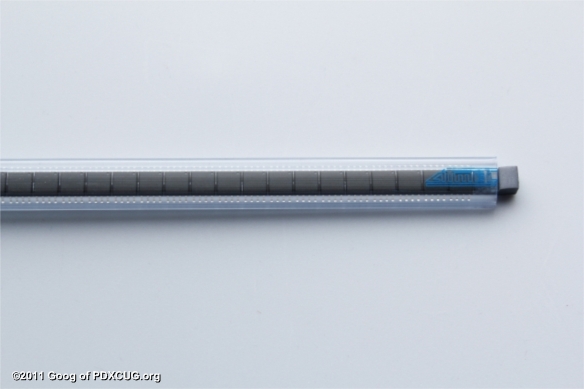
Agent Friday searched for some RAM for me and found the Atmel AT45DB321D. So I ordered a few for testing. Looks like a nice device and quite affordable, so I will likely be going with that if it works out well, unless I find a better solution.
Adding Micro SD Card
Posted on November 17, 2011 in Category: Blog - 0 Comments
OK, as long as I'm adding Flash RAM, I might as well add support for an SD card as well. This will provide the ability to load from D64s.
My Search for Flash RAM
Posted on November 16, 2011 in Category: Blog - 0 Comments
I'm starting to look for some decent, low-cost flash RAM for the Comet 2. The board is packed full of goodies and I've been thinking about scrapping the DE-9 connector altogether. Not sure if people would want that or not since it wouldn't need to be there for Internet access (lots of people connect an RS-232 port to another computer to get Internet access, but that is not necessary on the Comet).
With the on-board RAM, we can use it for storing and caching program files that are loaded from the Internet, loading directly from them, storing account settings, or just a nice general storage for just about anything.
Storing the uIEC on the Comet 2
Posted on November 15, 2011 in Category: Blog - 0 Comments
So I started thinking about how clumsy my uIEC is with the dangling wire to power it from the cassette port. It might be nice to have a space on the board to plug in my uIEC and power it that way - especially since I'm adding the IEC ports to the Comet. That way, I can just tie right in to the IEC lines and have my trusty uIEC right there with my Comet.
Circuit Design While Watching Tron 2
Posted on November 8, 2011 in Category: Blog - 0 Comments
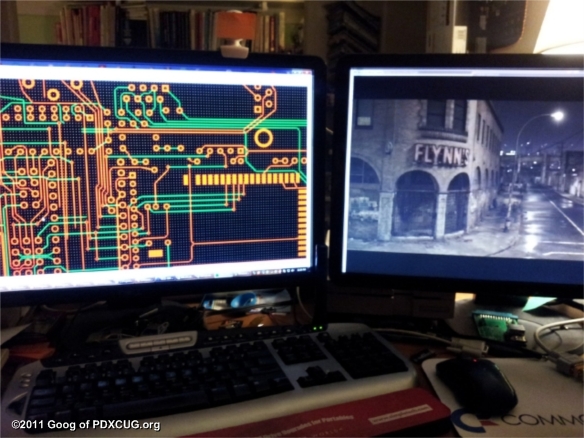
A little late-night designing while watching Tron on my other monitor.
Comet 2.0 Prototype Delay
Posted on October 28, 2011 in Category: Blog - 0 Comments
Well, I didn't submit the boards quite yet. As WizardNJ pointed out to me, I need a way to flash the firmware directly from the C64 (or similar) without having to require people to use the Arduino programmers. Seems obvious now - especially since I was hoping to have the Arduino accessible to others.
This will delay me a bit since I have to customize the Arduino bootloader.
Comet 2.0 Prototype Boards
Posted on October 25, 2011 in Category: Blog - 0 Comments
I got the first round of prototyping done - finalized the layout of the boards and am hoping to submit the design by the end of the week.
Parallel Data Transfer on the User Port
Posted on October 24, 2011 in Category: Blog - 0 Comments
While talking about the new design, JBev and Agent Friday both independently asked if they could have the Comet 2 provide the ability to have parallel data transfers on the user port. That will provide some amazing data transfer rates and will be fun to see. Thanks for the idea - I'll try my best to add it in.
Comet 2.0
Posted on September 30, 2011 in Category: Blog - 0 Comments
It's becoming more clear to me that I need to expand on the prototype and possibly go with a full-on new Comet 2.0 with all the bells and whilstles people have been asking me for. One of those features is being able to access the Internet directly from the IEC port. This is something that I've always wanted to do, but lacked the horsepower (no microcontroller) on the original Comet64. But now that I'm both putting in a micro and adding new features, I should be able to accomplish this with a new board design.
Another thing people were asking for is the ability to run a BBS server. That is something that the Comet64 should be able to do, but can't because AT modem commands are just not acceptable to the Comet64. So this will be a firm requirement for the new version.
Over the next few days, I'll be coming up with a list of new features to add to make a better Internet solution to meet the needs of both scenarios and probably even more.
Wi-fi Prototype Shown at ECCC 2011
Posted on September 29, 2011 in Category: Blog - 0 Comments
Had a great time at ECCC. While I was there, I showed several people my prototype of the Comet64 upgrade kit to make it wi-fi capable. Lots of great people there and lots of fun! See my photos at ECCC 2011 Photos
Comet64 Upgrade Prototype
Posted on September 2, 2011 in Category: Blog - 0 Comments
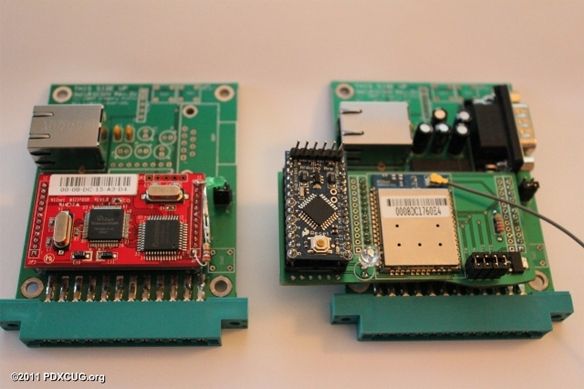
Getting ready to show the new prototype for my Comet64 modification. This modification allows a stock Comet64 to be used with a new module, providing a microcontroller and Wi-fi capability. I have a working prototype and I will be showing it at ECCC in Chicago later this month.
In preparation for ECCC, I decided to write a little room chat bot for CommodoreServer using the Arduino microcontroller that I'll be adding on to the Comet64. His name is Ardie and he answers yes/no questions when asked with answers found in a magic 8-ball. This just goes to show that having a microcontroller on the Comet64 is a useful feature because it allows extra programming to be done outside of the Commodore 64, completely freeing it up from any overhead involved. Interestingly enough, I can plug this in and turn on my C64 without loading any C64 software (since the program runs in the Arduino). It was just a fun little exercise and proof-of-concept to see how a microcontroller could be used.
I've been thinking that it might be fun to put a game server on the Arduino and have it respond to game requests done through CommodoreServer's game rooms. Might be a fun project to tackle later.
Wi-fi Comet64
Posted on September 1, 2011 in Category: Blog - 0 Comments
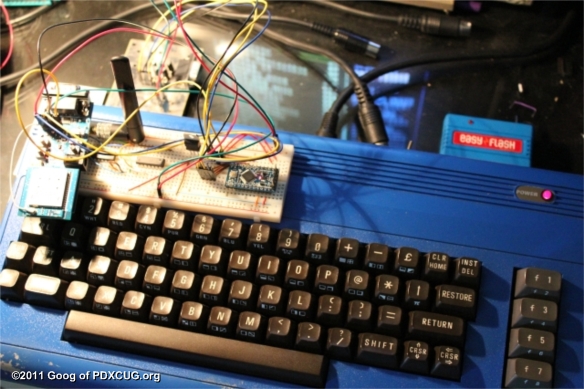
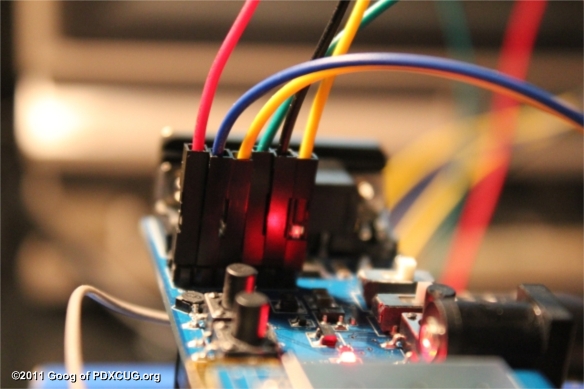
Here are some pictures of my earlier wi-fi testing for the Comet64 Internet Modem.
Notable Posts.


